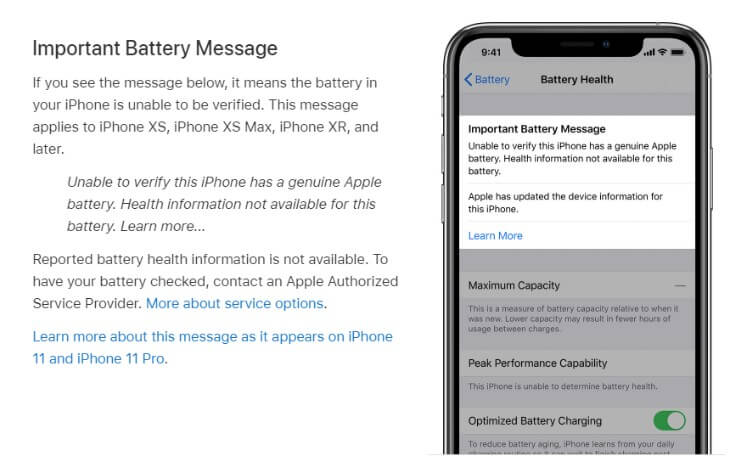
If you have an iPhone 11 or above model, you may have encountered a problem when you try to replace the battery with a third-party one. You may see a message on your lock screen that says “Important Battery Message: Unable to verify this iPhone has a genuine Apple battery. Health information not available for this battery.” This message can be annoying and frustrating, especially if you want to check your battery health and performance.

So, how can you remove this non-genuine battery warning from your iPhone? Is there a way to restore the battery health information and get rid of the annoying message? In this blog post, we will show you two methods to solve this problem. One is to replace the battery board with the original one, and the other is to use a software trick to hide the warning message from the lock screen. Let’s dive in.
Method 1: Replace the battery board with the original one
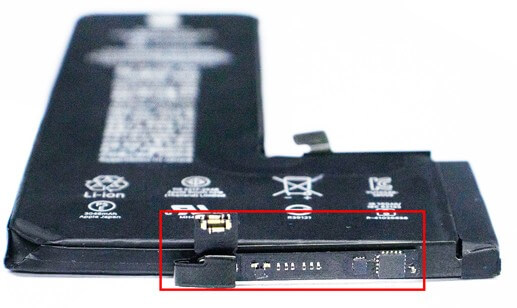
The reason why you see the non-genuine battery warning on your iPhone is that Apple has added a microcontroller chip on the battery board that communicates with the phone’s logic board. This chip stores the battery’s serial number, capacity, temperature, and cycle count. If you replace the battery with a third-party one, the chip will not match the phone’s logic board, and the phone will detect that the battery is not genuine.
The solution is to replace the battery board with the original one. The battery board is the small circuit board attached to the bottom of the battery. It has four solder points that connect it to the battery. By transferring the original battery board to the new battery, you can trick the phone into thinking that the battery is genuine and restore the battery health information.

To do this, you will need some tools and skills. You will need a pentalobe screwdriver, a suction cup, a plastic plectrum, a Phillips screwdriver, a soldering iron, and some solder wire. You will also need some patience and precision. Here are the steps to follow:
- Power off your phone and remove the two pentalobe screws on the bottom edge of the phone.
- Use a suction cup and a plastic plectrum to gently pry open the display from the frame. Be careful not to damage the display flex cables near the top edge of the phone.
- Undo the six Phillips screws and remove the metal plate that covers the display flex cables.
- Disconnect the display flex cables and take out the display assembly.
- Disconnect the battery flex cable and take out the battery.
- Peel off the original battery bottom cover tape and separate the battery board from the battery.
- Solder a new nickel sheet on the new battery and attach the original battery board to it.
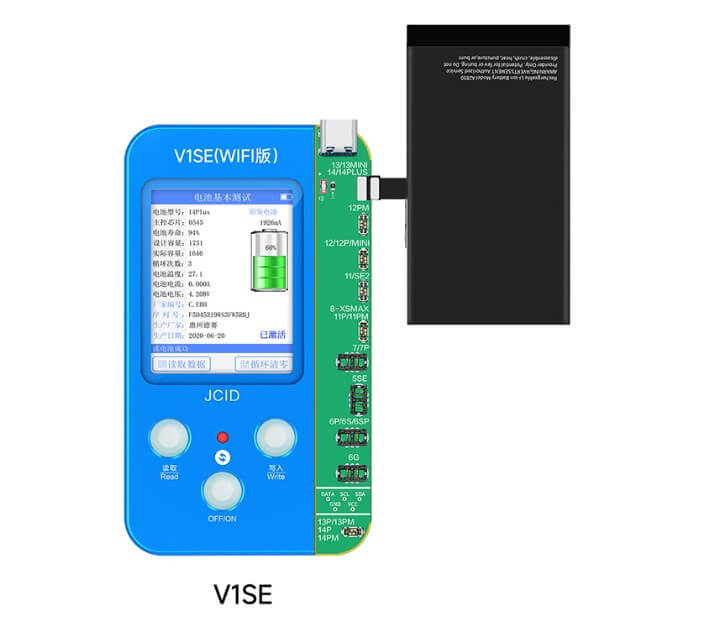
- Install the new battery and connect the battery flex cable.Place the “new battery” onto the battery activation tool ,like JCID VISE,to initiate the battery activation process.
- Reassemble the display assembly and connect the display flex cables.
- Screw back the metal plate and snap back the display to the frame.
- Screw back the two pentalobe screws on the bottom edge of the phone and power it on.

You should now see that your phone recognizes your new battery as genuine and shows you the battery health information.
Method 2: Use a software trick to hide the warning message from the lock screen
If you don’t want to mess with soldering or don’t have access to the original battery board, there is another way to remove the non-genuine battery warning from your iPhone. This method involves using a software trick to hide the warning message from the lock screen.
According to the general scenario, the pop-up message should automatically disappear within 4-15 days. Once dismissed, the message will not reappear. Based on my personal experience, the message typically vanishes within 2 days.
These pop-up messages can be easily removed, similar to deleting other apps with notifications. After removal, they do not automatically reappear. The message can still be accessed in the system, but it does not interfere with or disrupt any user activities during normal usage.
Conclusion
In this blog post, we have shown you two methods to remove the non-genuine battery warning from your iPhone 11 to iPhone 14 Pro Max. One is to replace the battery board with the original one, and the other is to use a software trick to hide the warning message from the lock screen. Both methods have their pros and cons, and you should choose the one that suits you best.
We hope you found this blog post helpful and informative. If you have any questions or feedback, please leave a comment below. And if you liked this post, please share it with your friends and followers. Thank you for reading!
